ACParadise Network:
American Cosplay Paradise
American Cosplay Experience
American Cosplay Snapshots
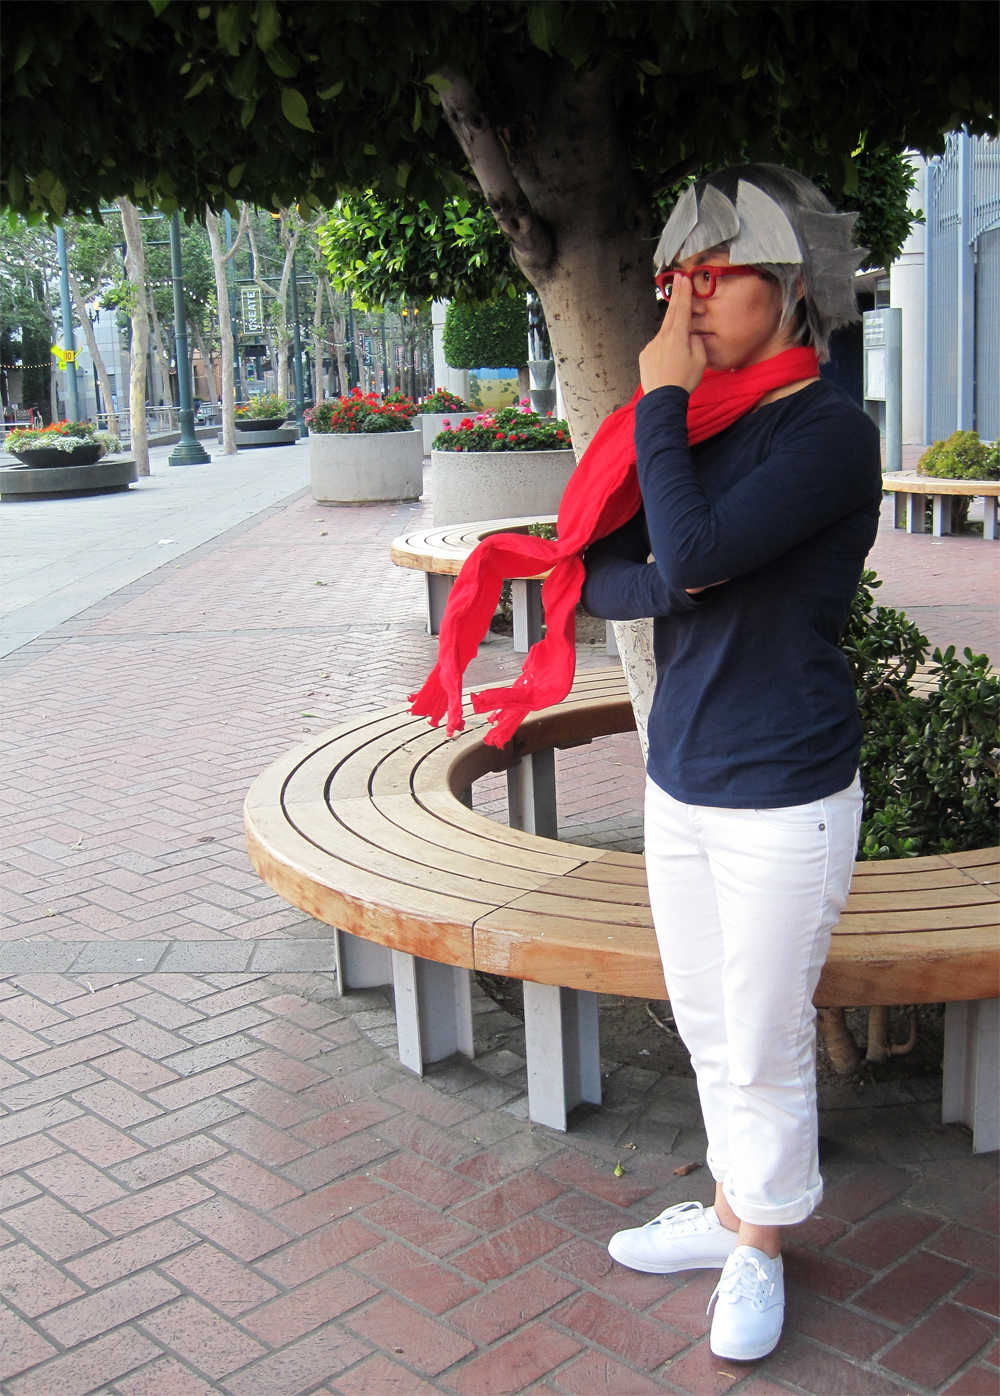
Cosplayer powerofunity > Costume of Reiji Akaba (Yu-Gi-Oh! Arc-V)
- Most Recent Photo
- 05-30-2016
- Series
- Yu-Gi-Oh! Arc-V
- Character
- Reiji Akaba
- Year Completed:
- 2016
- Construction Difficulty:
- Normal
- Costume worn at:
- FanimeCon 2016
About this Costume
- Construction Details:
-
===ESSENTIALS===
Glasses: Bed Bath and Beyond (red frames)
Scarf: Target (red, with wire and packaging tape inside)
Shirt: Macy's (dark blue)
Pants: Old Navy (white)
Shoes: Keds (white)
===OPTIONALS===
Wig: Arda (Classic Derek in Grey; Classic Short Wefts in Light Grey; stiff felt)
Earrings (eyeliner)
Duel Disk - Personal Thoughts:
- For some reason, I have always been fond of Reiji, ever since he made his first appearance in ARC-V. Even though his character wasn't officially introduced until later (wearing his Team Magma-inspired hoodie hehe), I was immediately drawn to his calm and serious personality, and he's definitely one of the reasons I kept up with ARC-V.
Wig Details
- Styling Notes
- The base of the wig is a Classic Derek in Grey from Arda Wigs. The bangs were created using stiff white felt from Michael's (no grey felt, sadly) and a package of Arda's Short Wefts in Light Grey. I basically followed Malindachan's Yami Yugi tutorial, except obviously with the bangs cut out in shapes to fit Reiji's hairstyle instead, and used tacky glue to slowly attach the weft fibers to the shapes cut out from stiff felt. Reiji's front-of-ear strands were probably the easiest part: I sprayed a small section of the base wig with Got2b Glued Blasting Freeze Spray, molded it into shape, and then put some tacky glue on the tip to make a point.
- Wig Review
- In hindsight, Arda's Adam, Priscilla, or even Katinka would probably have worked better (especially regarding the bangs), but as of writing, none of those wigs are available in Grey.<br /><br />Most of the tutorials I've read say to use hot glue to attach the bangs to the base wig, but since I don't have a hot glue gun, I tried tacky glue. It ended up working out fine; I just had to wait a few hours after gluing each shape on in order to let it fully dry. This step ended up taking several days because I had to space everything out, but I'm quite pleased with how it turned out.
Add a Comment


 Upgrade Cosplayer
Sorry, you must be a registered user of and logged in to view and add comments. Either log in or register now!