

ACParadise Network:
American Cosplay Paradise
American Cosplay Experience
American Cosplay Snapshots
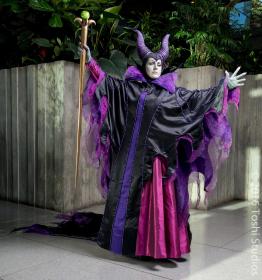
Cosplayer Seifer-sama > Costume of Maleficent (Sleeping Beauty)
- Most Recent Photo
- 06-15-2016
- Series
- Sleeping Beauty
- Character
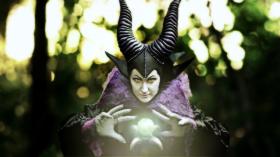
- Maleficent
- Special Variation:
- Fashion Doll Inspired
- Year Completed:
- 2016
- Construction Difficulty:
- Very Difficult
- Costume worn at:
- FanimeCon 2016
- Sakura-con 2016
About this Costume
- Construction Details:
-
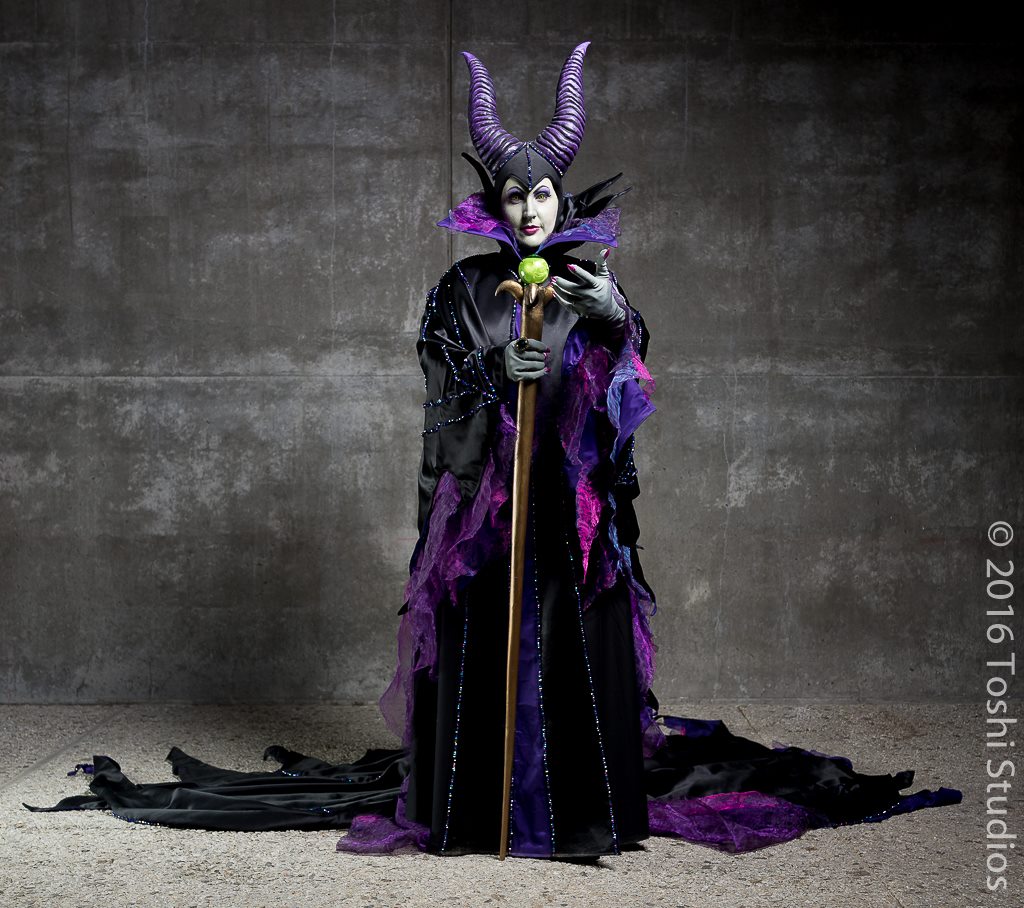
The pink dress: I was trying to base my design off the doll since this is the only time you get to see the dress under the cloak, but I didn't like the mermaid dress, so I went with something a little more medieval looking. I even made my own petticoat for it!
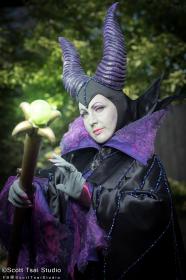
The cloak was made from my own design and studying the Fashion Doll. It took me a number of tests to get the sleeves and the front panel to look right. Once I was happy with the pattern I cut out the main black, the purple lining, and the two organza layers. I started by sewing the black base together and began beading down all of the seams. Once I finished all the inside seams I attached the lining and the organza layers to the black base, hemmed the edges and then continued to bead down those seams as well. It's taken a couple months but I've finally finished all of the beading and am super pleased with the results. One of the last things I did on the cloak was the collar. After a few tests I was able to get the shape I wanted, then I stabilized the layers, beaded down all the seams, and then attached it to the cloak. Once all that was completed I was able to attach the brooch, which I think adds a nice elegant touch to the costume.
Next up I started on the horns. I heard some cosplayers were using insulation foam for things like this, so I thought I would give it a shot. I had to glue four layers of the stuff together so I could get the curvature of the horns just right, but after an hour or two or carving the excess away, they were really starting to take shape. I made all the grooves with a rotary tool, resanded the whole thing, and then covered them in wrobla. I made a skull cap / helmet also out of worbla and then attached the horns to it.
Once the horns were attached I was able to pattern the cowl off of the worbla skull cap. It took a few tests and tries to get the fit right, but for my first full cowl, I'm pretty happy with it. I stabilized the neck area, beaded along the seams and then beaded the center seam and the two seams around the horns. There's also a zipper in the back to make it easier to put the darn thing on.
The staff was the last part of the costume I worked on. I began by carving out the base and the four claws from the same insulation foam that I used for the horns and then covered them in worbla. After a few layers of gesso and wood filler I was able to sand it smooth and paint it. The globe is a plastic ornament I picked up about a year ago, stuffed with with organza and fairy lights to give it that eerie magical glow.
What's Left:
Diablo - Personal Thoughts:
- Sleeping Beauty is probably my favorite classic Disney movie, with Maleficent being my all time favorite villain. She's so elegant, strong, and so evil! It was inevitable that I'd one day make this costume, I just had no idea I was going to go as all out as I did. While researching this costume I came across the Fashion Doll and noticed she had beautiful beads down all of the seams of the costume and organza accents. I immediately fell in love and knew this was the version I wanted to do. I'd never beaded anything before now, but that wasn't going to stop me. As soon as I had the fabrics picked out I ordered about 5,000+ beads and began this monster beading project. It's taken months of work, but I'm so happy to see the final result and very excited for some villainous photos!
Add a Comment


-
 356380 Visitors
 -
- Cosplayer Info
- Costumes Worn
- Costumes Made
- Props
- Wigs
- Favorites
- Videos
- Convention History


Sorry, you must be a registered user of and logged in to view and add comments. Either log in or register now!