ACParadise Network:
American Cosplay Paradise
American Cosplay Experience
American Cosplay Snapshots
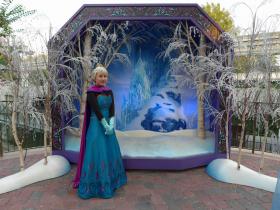
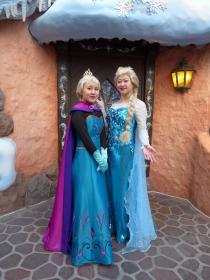
Cosplayer Kerorii > Costume of Elsa (Frozen)
- Most Recent Photo
- 05-31-2015
- Series
- Frozen
- Character
- Elsa
- Special Variation:
- Coronation version
- Year Completed:
- 2014
- Construction Difficulty:
- Difficult
- Awards
- Best in Show Wondercon 2014
- Costume worn at:
- WonderCon 2014
- Videos
- Featured in 1 Videos
About this Costume
- Construction Details:
-
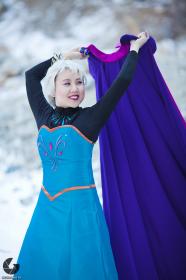
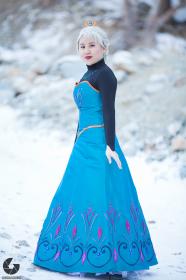
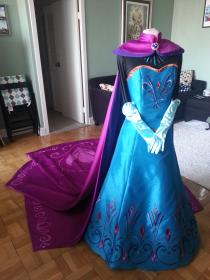
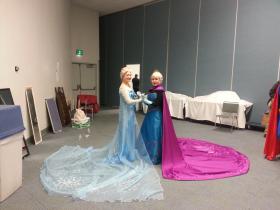
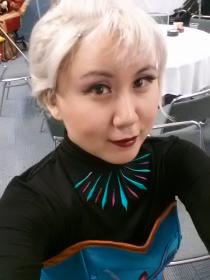
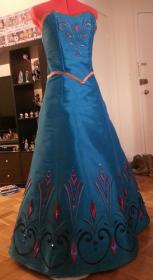
Dress Embroidery: I referred heavily to Brittney Lee's blog posts since she posted the better photos of her designs for Frozen than what was available in the artbook. However, it took some strategic screencaping to find the surprise pattern on the back of the dress (yes there is one and you see it flash by in two shots of Let it Go LOL)!
After gathering all references for the embroidery patterns, I drew and cut the patterns out of free market coupon newspapers to get the scaling right for my body. Then scanned in the patterns to be digitized for embroidery. I had a small 4x4 embroidery machine to work with so I fit as many designs I could into the 4x4 space and split larger designs to smaller pieces. All sewing was done using Sulky embroidery threads which have a gorgeous shine to them. Once the sewing was done, I added a thin layer of glue to hold the threads together, cut all pieces individually out of the embroidery sheets, burned the edges with soldering iron to get a smooth edge then glued each piece to the dress. Any circle shapes in the pattern I did using rhinestones. This was all VERY tedious to do but I loved the results!
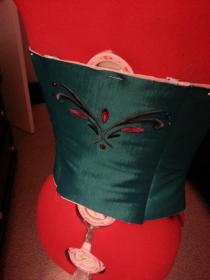
Dress: I used a basic A-line dress pattern from Simplicity for the base but modified the pattern to have the sweet heart neckline and V front. The dress is made of stretch taffeta but the bodice is boned and lined to be more fitted.
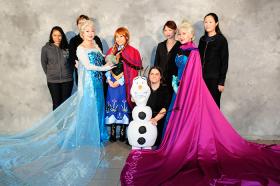
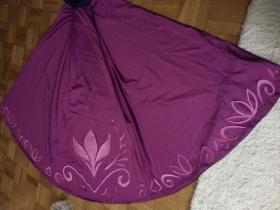
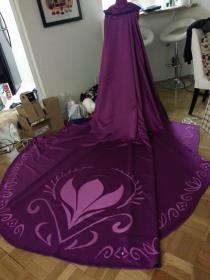
Cape: The cape pattern I first made by draping fabric onto a dressform and letting it fall naturally. Then I cut the cape to shape since it's about Elsa's height in the front but crazy long in the back. The cape was made with satin on the outer layer then lined with peackskin crepe mainly because those were the fabrics I could find in the correct pink and purple. The top collar of the cape is heavily lined to support the weight of the cape. I put two snaps in to easily take it on and off.
The cape designs I cut out of silk taffeta which had a gorgeous soft sheen when the light hit it. The patterns were heat n bonded on. I had to rely mostly on photos of the limited edition doll and several screen caps to figure out the back pattern of the cape. I'm still not sure if I got it right but I love the end result!
Cape brooch: I found a gorgeous 27mm cabochon stone and a rim setting for a necklace to go around it. The size was perfect and it really became a great center piece!
Shoes: I bought patent loafers that were close to the shape of the shoes you see Elsa wearing when she lifts her skirt. There is a design on the shoe and this is again where I relied on photos of the limited edition doll for the design of it. I digitized and embroidered a patch get the pattern on the shoe.
Tiara: I drew a few iterations of the tiara until I got the size right. I laser cut it out of lexan then spray painted it gold gluing a center rhinestone at the center.
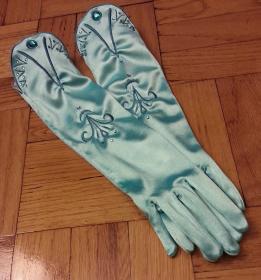
Gloves: I initially tried to make gloves but hate sewing gussets so I found pre-made gloves that I could embroidery. I ripped the stitching to open up the gloves then stretched it into the hoop for embroidery, loaded it onto the machine then crossed my fingers that it'd work. And it did! The embroidery came out perfectly! I love how the gloves turned out! - Personal Thoughts:
- This costume was an absolute labor of love and considering how labor intensive it was due to all of the embroidery details and ginormous, it certainly needed a lot of it! XD
Add a Comment




Sorry, you must be a registered user of and logged in to view and add comments. Either log in or register now!