ACParadise Network:
American Cosplay Paradise
American Cosplay Experience
American Cosplay Snapshots
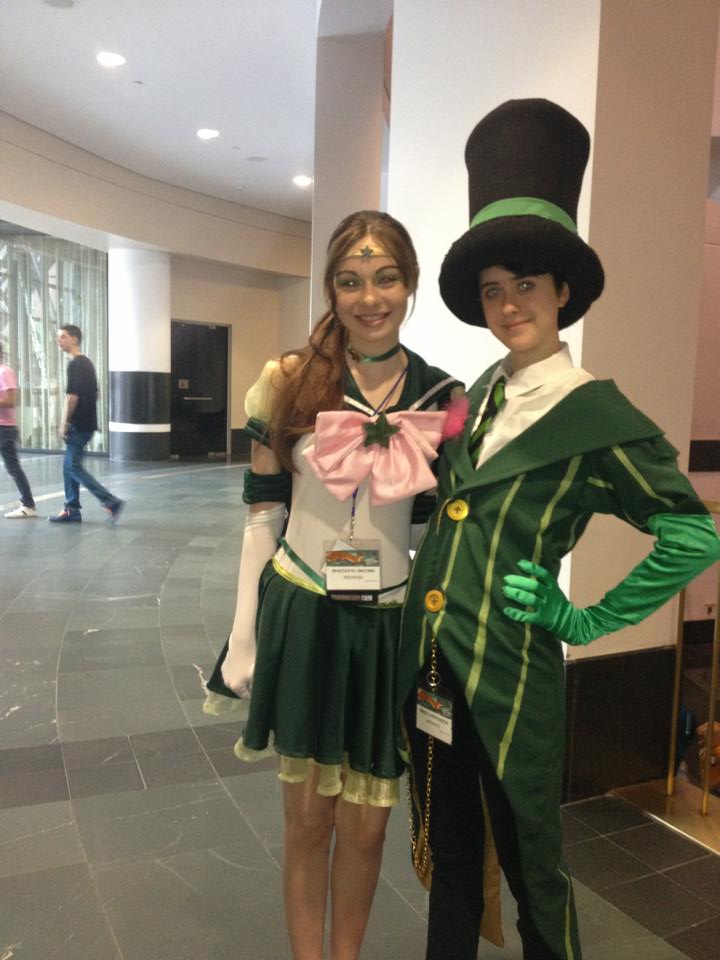
Cosplayer Fancy_Duckie > Costume of Eternal Sailor Jupiter (Sailor Moon Sailor Stars)
- Most Recent Photo
- 12-19-2013
- Series
- Sailor Moon Sailor Stars
- Character
- Eternal Sailor Jupiter
- Year Completed:
- 2013
- Construction Difficulty:
- Very Difficult
- This was made as a commission for someone else
- Costume worn at:
- Anime Boston 2013
About this Costume
- Construction Details:
-
This was made for my dear darling Emily, since Jupiter was her favorite senshi growing up and because she looks really good in green. All of the solid satin is from the casa collection, as is the lighter green organza. We went with the darker anime green for a couple of reasons; one was that everyone else was doing the darker colors and the other was that we couldn't find a green that was different enough from the organza to make a contrast.
The tiara and all of the small stars are made from foamie; the tiara star is actually a glow-in-the-dark stick on star that was painted green. The tiara has holes punched in the ends where a little piece of clear elastic jewelry string loops around to keep it on. The choker is just a piece of ribbon with a foamie star hot glued to it, and a safety pin in the back to secure it. I cast the brooch from resin and I used candy molds as a last-ditch effort to get them done before the convention, the back is painted and has a super sized safety pin hotglued into it so that it can attach to the boob bow. The boots are Funtasma Pleaser brand, and the ribbons around the top are hotglued on there; (I'm scared to cut them into the V shape that they're supposed to be, just in case we use the boots for another cosplay). The gloves were purchased, and for the glove/sleeve rolls and bows, I more or less followed sparklepipsi's tutorial.
Butt-bows and boob-bows were made pretty much the same way, (the only difference is that boob bows have interfacing and butt bows do not). I cut out 4 total squares of fabric, sewed them into two rectangles, squished them in the middle until they looked how I wanted them to, and then wrapped a rectangular piece of fabric around the middle to hold it in place. The buttbows also have two ribbons sewn on to them, and attach via snaps to the back of the skirt. The boob bows attach to the sailor collar via snaps and the sailor collar attaches to the bodysuit via snaps. The bodysuit was made by me out of swimwear liner and a lyrca/spandex blend; I used the Green Pepper Crystal Lake pattern for it. There are now snaps in the crotch for easy bathroom use. The sailor collar was made by cutting two "collars" out and sewing the ribbon onto the top collar and then sewing the two collars together. The skirts are two circle skirts that are knife pleated and then sewn to the lower ribbon belt. The upper ribbon belt is sewn directly on top of the lower belt where the star goes. To get the V shape, I just cut the ribbons at an angle and then sewed the two pieces together. The belt ribbons are now attached to the bodysuit with iron-on velcro which is like the coolest thing since sliced bread. For the sleeves, I just patterned out REALLY BIG sleeves and knife pleated them at the top and bottom. For the sleeve rolls, I cut a rectangle into the circumference of the upper arm x 5 inches, folded it the hot-dog way with the pretty sides facing out, sewed the two tunnels for the stuffing and left the top part blank. This is what I sewed the bottom of the sleeves to. I then sewed up the sleeve and rolls (after stuffing) to make the sleeve into a sleeve, and then sewed it directly onto the bodysuit.
THE BOOBS: Were achieved through the wondrous magic of Jenna Marbles on youtube. Emily started out with a lightly padded push-up bra, and then layered the Victoria's Secret Bombshell bra on top of that, and tied her straps together in the middle with a piece of ribbon. I think she might have added extra padding into the first bra but I'm not 100% sure. Then, poof!, she has bigger boobs than me (I'm naturally the bustiest in our group)! - Personal Thoughts:
- I HAVE THE MOST TALENT!
Wig Details
- Styling Notes
- We had to trim the bangs, the ponytail clip, and the edges of the wig to hide Emily's hairline because she has a ginormous head and VERY thick hair.
- Wig Review
- This was her first con so she hasn't mastered the art of "wig-fu" as we like to call it. The clip in the wig was causing her too much pain so we just let her use her natural hair & bangs, and just clipped the ponytail into her hair. Luckily, she had just dyed it to a shade close to the one of the wig right before the con!
Add a Comment


Sorry, you must be a registered user of and logged in to view and add comments. Either log in or register now!