ACParadise Network:
American Cosplay Paradise
American Cosplay Experience
American Cosplay Snapshots
Cosplayer Sumikins > Costume of Torahime (Muramasa: The Demon Blade)
- Most Recent Photo
- 06-18-2013
- Series
- Muramasa: The Demon Blade
- Character
- Torahime
- Year Completed:
- 2013
- Construction Difficulty:
- Costume worn at:
- Katsucon 2013
About this Costume
- Construction Details:
-
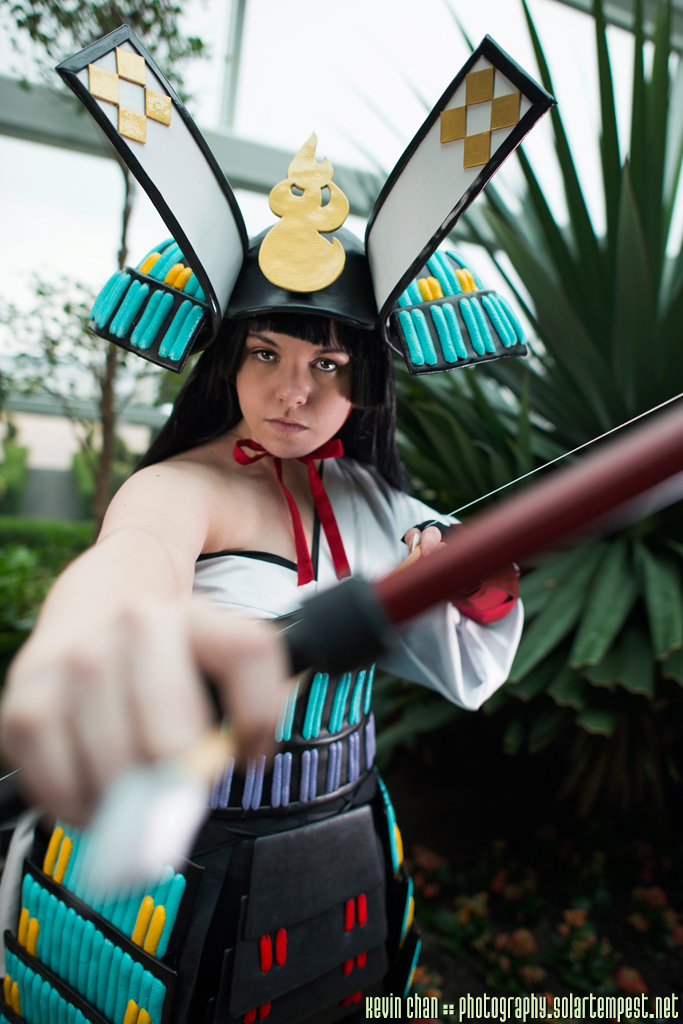
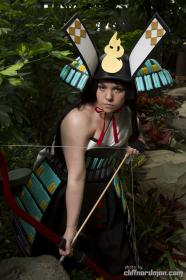
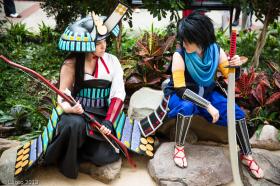
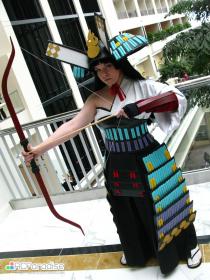
The wig was made by sewing together 3 (well, more like 2.5) wigs that I bought on Ebay. The robes were made of satin-back shantung from JoAnn, using a Simplicity pattern. The Hakama I made from a rayon-linen blend suiting, which I strengthened by using fusible interfacing on all of the pieces. I sewed the hakama according to a tutorial I found online, and used my new serger to finish all the seam, because linen frays like crazy. The waist-syncher-armor was made by modifying a princess-seamed strapless dress pattern, and consists of 3 layers: the outer layer (costume pleather from JoAnn), the middle layer (duck clothe and combination steel and plastic boning), and the lining (black cotton). The edges were bound with pieces of the same black costume pleather, and the piece is laced up the back. The leg armor was made by cuting pieces of matteboard, and gluing a piece of craft foam on top. Each tile was then wrapped in the same costume pleather. The tiles were held together with strips of velcro on the back.
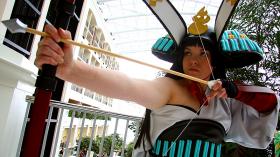
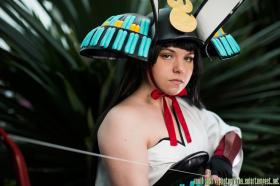
I've saved the Helmet for lats, because it is truly the most complicated piece in this costume. I started with a craft foam 'construction helmet' that I bought at Michaels. Usually intend for kids to play with, I heated and stretched it, and then cut tons of tiiiiny strips of craft foam, which I used to cover the entire main headpiece. I then poured resin all over it. to fill the grooves. this was a very long and tedious process. I build the top-most domed tier on the helmet by creating a series of strips of craft foam and matte baord, to create a 'cage' of sorts, and then filled the whole shape in with more strips of craft foam. I did the same thing afterwards, to create the second/bottom tier, though the process was slightly different since the bottom tier doesn't exactly 'dome'. Many of the grooves and bumps were filled in with elmers wood putty, sanded down, and then painted with resin. The entire helmet is covered in pieces of the black costume pleather, and the inside lined in black felt. The white and black 'wings' on the sides were made from pieces of curved matteboard, covered in white craft foam, and trimmed in carefully-pieces black craft foam. I cut and varnished 8 craft foam squares, then painted them, and varnished them AGAIN, attached them to the helmet wings, and then varnished the whole thing until it didn't look liek craft foam anymore. The flame was drafted by hand, cut out of matterboard, and craft foam, varnished, and painted with the same paint as the gold squares; it attached to the helmet via a block of velcro.
The arm guard was made last-minute by my friend Kayla (BATCosplay), who already had experience with her Kisuke costume and offered to help me out in my crunch time. The bow was made from MDF by my friend Mandy (Nutcracker).
All of the colored ridges on the helmet, armor, and waist syncher, are what's called Backer Rod. It's this weird foam stuff usually used to fill crevices to be caulked when doing tile work. I don't reccomend this to anyone -- the only way to attach it to anything without the foam melting/disolving, was low temp hot glue, which ultimately did not want to stay stuck to the pleather. I painted each one individually (with a lot of help) and ultimately, the paint did not want to stick to the backer rod pieces -- it chips and peels worse than nail polish on oiled nails. By the time I got it to and from KatsuCon, the paint job was basically destroyed. If someday I can strip and salvage my helmet (really the piece that took the most work, and the piece I'm most proud of), I might re-do this costume someday... but I need some time away from it for a while. - Personal Thoughts:
- Honestly, I'm disappointed with this costume. So disappointed, I actually get kind of sick thinking about it. It looks pretty good in pictures, but it was so difficult to wear, I was in physical pain for those several hours. Also, the paint I used didn't want to stick to any of the ridges, no matter what I tried, so in the end, I'm retiring the armor, and doing to make her additional Obi to wear her 'Princess' form with my group next time.
If someday I can strip and salvage my helmet (really the piece that took the most work, and the piece I'm most proud of), I might re-do this costume someday... but I need some time away from it for a while.
Add a Comment




Sorry, you must be a registered user of and logged in to view and add comments. Either log in or register now!