ACParadise Network:
American Cosplay Paradise
American Cosplay Experience
American Cosplay Snapshots
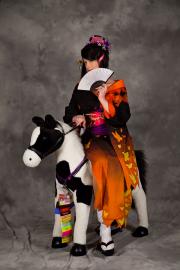
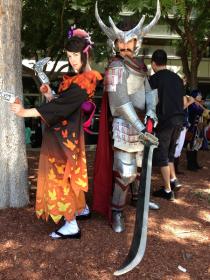
Cosplayer Enkai > Costume of Nouhime (Sengoku Basara)
- Most Recent Photo
- 06-04-2013
- Series
- Sengoku Basara
- Character
- Nouhime
- Year Completed:
- 2011
- Construction Difficulty:
- Very Difficult
- Awards
- 2010 Best Group Craftsmanship at Fanime
- Costume worn at:
- Animation On Display 2012
- Anime LA 2013
- FanimeCon 2013
- FanimeCon 2012
- FanimeCon 2010
- Japan Expo USA 2013
About this Costume
- Construction Details:
-
Working on this costume was spread out over a couple years. I started and "finished" it in 2010, entered it in Fanime masquerade with my husband in Nobunaga and our group's Date and Ranmaru, won best group craftsmanship, then took it apart with intents of getting it better.
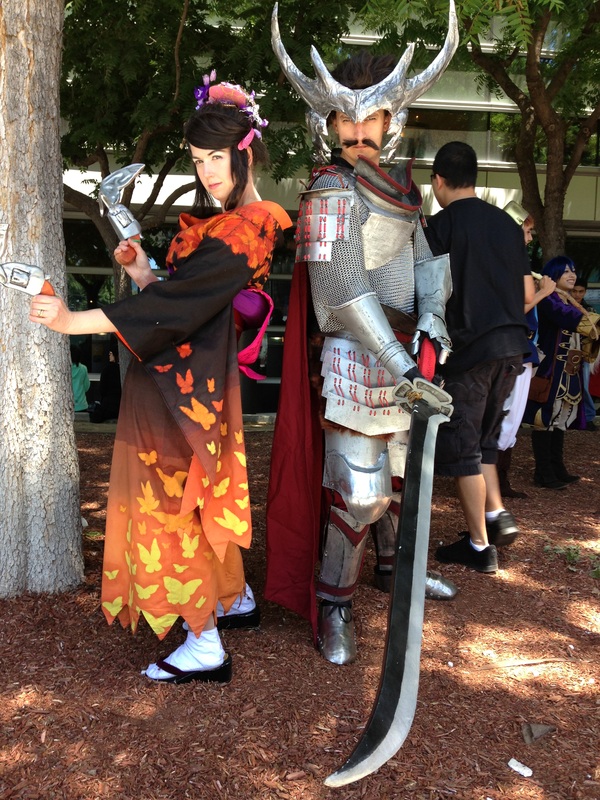
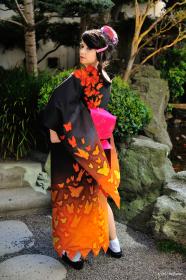
The reason behind the taking it apart was the gradient. I achieved the butterflies by using batik. First, I dyed the kimono yellow, then I added wax where I wanted the first level of butterflies. Then I did a gradient dye of orange, followed by another layer of wax. That was followed by a red-orange layer, with the final butterflies. Then I dyed it black.
Or so I thought. That black layer left it at best a slightly brown orange, but I didn't have time before Fanime to get it black, so I took the wax off and "finished" the costume.
And as soon as Fanime was over (as in, during the car ride home), I was ripping all the seams out so I could get the thing actually black.
It sat for quite a while before I got back to it. I decided the red wasn't red enough, so I redid the wax to get another red layer. Once the red was done, I put the last of the wax on and dyed it black again. And then reapplied wax where necessary and dyed it again. And again. All in all, that thing got dyed TEN times, and it still wasn't black.
So I discovered dye-na-flow and painted the thing black. To get the gradient for that, I mixed Jaquard's colorless extender and made 10 levels of varying transparency black. And it was finally black. And I was happy. I don't think even I want to know how many hours went into that dang thing.
Compared to that, the rest of it was pretty low drama, although I did make just about everything except for my tabi socks (which I did have to take in at the heel, but I didn't make them from scratch).
I did the obi as a tsuku-obi (false bow) out of a brocade I found at Joann's and numerous layers of interfacing. The hook at the back to hold it on was made taking a pair of pliers to an old wire coat hanger. I could find an obijime (the cord) I liked, so I wove one out of embroidery thread using an 8-strand braid technique. This was eventually replaced (November 2012) by a gold obijime I purchased in Japan on vacation. I dyed the scarves myself, using some extra silk I had lying around. The tassels were all made from embroidery thread.
The zori sandals were constructed from scratch. I found a cheap pair of foam sandals with the basic shape, carved holes out for the straps, then covered the sides and bottom with paper mache. I painted them glossy black, then glued the soles on. The soles were hand made using cardboard and old beach mats. When researching zori, I found out that they were made from tatami, which, surprise surprise, looks an awful lot like some of the falling apart beach mats my parents had. I edged the soles with some black fabric, then I threaded the straps, made from purple velvet cored with rolled up broadcloth for some extra strength.
The wig was a whole new story in and of itself. It was scratch built. Me being my super white Caucasian self, black hair washes my skin out something awful, and I didn't like any of the "natural" black base wigs I could find at the time. So I custom blended a whole bunch of fibers off of Doctored Locks, did a custom lace front and wefts, and scratch built a wig off using an old laundry bag as a base. The accessories were a combination of clay, plastic sheets, and fake flowers from Michael's. One of the hair pins and most of the flowers were replaced in late 2012 when I found a number of character appropriate accessories at a thrift store in Japan.
I finally completed the guns for Fanime in 2013. They're a combination of material. The handles are a bunch of layers of basswood laminated together and cut and sanded to the curved handle shape. They were then stained. The guns themselves were constructed using a basic framework of cereal boxes forming the box shape, several dowels to create the gun barrel, and a polymer clay revolver barrel. Shape was filled out using model magic, and the wings were cast from resin. This was all paper mache'd over, and gessoed and sanded to get it all looking like one piece. Finally, a few coats of silver paint were added, and the aged metallic texture was added brushing and wiping black acrylic.
As of June 2013, numerous wears have caused the wig and the shoes to take quite a beating, and the "final" items on my to do list to complete the costume will be to redo the wig, this time with a base wig from Arda. Additionally, I will remake the shoes, this time custom making them from wood, now that I have the shop tools. - Personal Thoughts:
- The reason for choosing Nouhime was simple. My cosplay group decided to do Sengoku Basara, and my husband took one look at Nobunaga and said "I'm doing that" (and it meant I wasn't stuck doing Kasuga).
Add a Comment




 Upgrade Cosplayer
Sorry, you must be a registered user of and logged in to view and add comments. Either log in or register now!