ACParadise Network:
American Cosplay Paradise
American Cosplay Experience
American Cosplay Snapshots
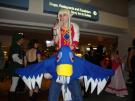
Cosplayer Kel-c-Chan > Costume of Zelda (Legend of Zelda: Skyward Sword)
- Most Recent Photo
- 02-03-2012
- Series
- Legend of Zelda: Skyward Sword
- Character
- Zelda
- Year Completed:
- N/A
- Construction Difficulty:
- N/A
- Costume worn at:
- OhayoCon 2012
About this Costume
- Construction Details:
-
The whole costume was put together in under a month (probably more along the lines of 2 ½ weeks?) whilst starting a new full-time job. As with any cosplay I’ve done so far it was a whole new world of trial. This the first time I’ve sewn and done everything by myself. The dress is a Butterick pattern (B4827) that was shortened in the hemline and the sleeve length (annnnd almost everywhere else was too big so I had to do a lot of taking in). All the yellow designs are bias tape (the bottom and neckline is double sided while the sleeves and design around the diamond are single sided). The boots were bought off ebay.
The wig came from ebay seller “wigfashion”. I ordered my Erza wig back last October and really liked it, but the only issue with this seller is since it comes from Hong Kong you do have to wait quite some time, so it’s not good for something short notice. My blonde wig literally came 4 days before I left for the con, so I was close to panicking. To make the hair braid thingies I parted the hair as needed, hairsprayed it and then tied it. To give a little extra bulk to the front pieces (as Zelda had big ole’ fat hair pieces) I rolled a little bit of quilt batting in the center, covered it as best as I could with the hair and then hand sewed the ribbons on top. It was very time consuming to say the least. If you want to take short cuts, I’m sure you could hot glue the ribbon (or the hair to the batting), but I didn’t want to make it permanent in case I wanted to wear the wig again for something else.
The shawl was bought at Walmart (I swear I ran all over the mall and finally found this dumb shawl for $5 at Walmart). I know they sell better quality ones at Macy’s but I was not willing to spend $25 on a piece of fabric! The bracelets were bought at Claire’s and I spray painted them green. The elf ears came from Aradani for a price I was not really happy to pay :<
The belts were a big challenge. I probably sat in my room staring at the same image of Zelda and my fabric almost hoping it would make itself. I sewed the darker blue piece on top of the light sky blue and made the belt loops make sure to fit the pleather belt. I painted the Hylian crest with a stencil and fabric paint (BTW make sure to test what you make your stencil out of, because mine failed and the paint basically glued the paper to the fabric leading me to a little meltdown only 3 days before the con. Also take care in how you fasten the belt because I failed at that too, resulting in the need to have my boyfriend safety pin me into the belt.
The circle belt was made of 3 different things. The circle raised discs themselves were hot glue and I based their creation off the hot glue casting tutorial. They were then primed with gesso, sanded to try and make them smooth as I could and then painted with gold acrylic. The flat round disc was the thick posterboard with the foamcore sandwiched in between (you can get it at craft stores and such). I cut them out and then painted. I hot glued the raised discs onto the flat ones and then attached them by using a long strand of bias tape that I glued to the back of the posterboard. Running out of time and ideas I had to have my boyfriend safety pin me into this one too (sensing a trend?) I was so worried it would fall apart, but proved extremely resilient all day!
The diamond shapes I was really happy with how they turned out. I think the one on my dress may be a bit too large, but it’s easy to remake! They are made out of plastic transparent plates. Like the ones you can get at WalMart or a party store. True story. I cut out the triangle shape on the plate, hot glued the pieces together, painted the backside of them with a metallic blue (if you paint the front it will just scrape right off) and then inserted a tiny piece of tinfoil to give it a little extra shimmer. I just glued the small one onto the craftfoam belt buckle piece and then I glued bias tape around the edges of the big one and sewed it to the dress.
Wig Details
- Wig Brand
- Wig Fashion
- Wig Name
- Long Straight CG03
- Original Color:
- Platinum Blonde
- Styling Time
- Way too long
- Styling Notes
- It took me about 4 hours. Now this is because 1) it was the first time I actually did any styling on a wig and 2) I hated how it looked the first time so I pulled them out and redid it.
Add a Comment


 Upgrade Cosplayer
Sorry, you must be a registered user of and logged in to view and add comments. Either log in or register now!