ACParadise Network:
American Cosplay Paradise
American Cosplay Experience
American Cosplay Snapshots
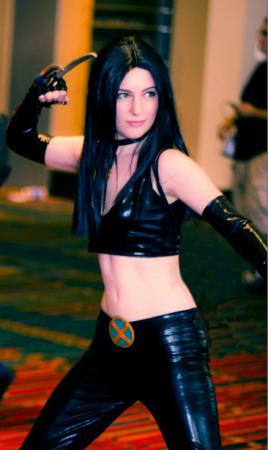
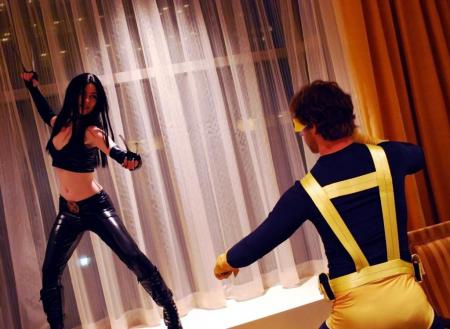
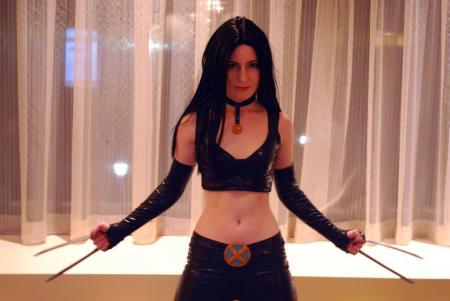
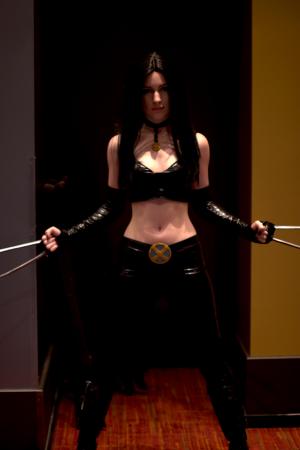
Cosplayer Seizetsu > Costume of X-23 (Marvel vs Capcom 3)
- Most Recent Photo
- 07-20-2011
- Series
- Marvel vs Capcom 3
- Character
- X-23
- Year Completed:
- N/A
- Construction Difficulty:
- N/A
- Costume worn at:
- ConnectiCon 2011
About this Costume
- Construction Details:
-
I choose to make this costume because I love the X-Men. I think the series as a whole is fantastic! I wanted to cosplay a badass character with a power that was easily expressed visually, and there are very few things more visually badass than retractable metal claws. X-23 also has a small build like me, and is totally one of the coolest characters in Marvel vs. Capcom 3, which is the particular incarnation that I chose to create. Now onto how I constructed this outfit. Lets start from the top with the wig. I bought this kanekalon wig on ebay for a good price. The wig was too long when I got it, so I trimmed it, thinned it, and put in a few shaggy layers to give it movement. I angled the front dramatically, and trained the bangs to stay out of my face. Training this wig took a lot of work. At first I thought that I had been sold a heat resistant wig by accident it was so unresponsive to heat! So I took a scrap of fiber and tested it with a hair-straightener on the lowest setting. No, I was not sold a heat resistant wig, it was just really stubborn. So I just worked at it for longer and eventually got the fibers trained away from my face and sprayed them in place. I also used a wig lusterizer to give the wig a little more shine and prevent tangling. All of the clothing was made from two-way stretch PVC. That stuff is very difficult to work with. Ugh. You can read more about working with PVC under my tutorials. The necklace was relatively easy to make. I glue-hemmed the PVC into two strips, and sewed one in a loop around another. To clasp the necklace, I used one black hand-sewn snap. The pendant is made from polymer clay; I used a mix of “jewelry gold,” yellow, and beige to get exactly the color that I wanted. After the clay was baked, I sanded and polished it, and coated it in an air-dry resin glaze and glued it to the necklace. Now for the fun part (or at least they look like they were fun), the claws! At first I tried to make the talons out of pine wood coated in resin. But I had issues with the resin, and the claws did not come out how I wanted them to. So I started again using only pine wood, and whittled the wood into the exact shape needed. Each claw was meticulously sanded, then primed, painted, and finished with a glossy top-coat. They were then mounted to a rigid stack of pellum, upholstery fabric, and a heavy cotton with both glue and a metal rivet. That rigid stack of fabric was then mounted to “gloves,” that I made removable with velcro straps. The claws are extremely durable, stable, and I can still use my hands while they’re on. Though, if I needed to, they were very quick to take on and off. You can read more about this costume, and find more picture of this and other cosplays at http://shaunartcosplay.wordpress.com http://shaunartcosplay.wordpress.com/completed-costumes/video-game-original-design-cosplay/x-23-laura-kinney-marvel/
Wig Details
- Wig Brand
- Unknown
- Wig Name
- Extra Long Straight
- Styling Time
- 3 hours
- Styling Notes
- Cut it myself, trained the front out of my face with low heat, held in place with hairspray and put a lusterizer in to keep it shiny and tangle-free
Add a Comment





 Upgrade Cosplayer
Sorry, you must be a registered user of and logged in to view and add comments. Either log in or register now!