ACParadise Network:
American Cosplay Paradise
American Cosplay Experience
American Cosplay Snapshots
Cosplayer Mehdia > Costume of Yuuko Ichihara (xxxHoLic)
- Most Recent Photo
- 07-25-2015
- Series
- xxxHoLic
- Character
- Yuuko Ichihara
- Special Variation:
- Chapter 9 Splash Page
- Year Completed:
- 2012
- Construction Difficulty:
- Difficult
- Awards
- Intermediate Level Winner-Anime Blues Con 2011
- Costume worn at:
- A-Kon 2011
About this Costume
- Construction Details:
-
This costume was probably one of the most evil things I've ever worked on in my life. Let's start with the stuff I'm good at, the fabric aspect, shall we.
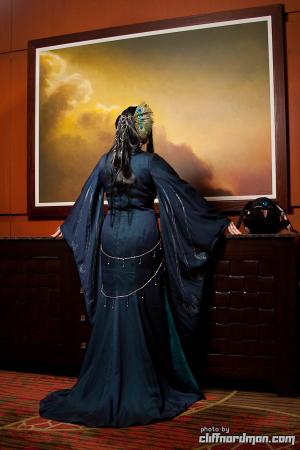
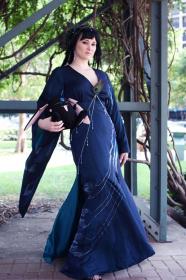
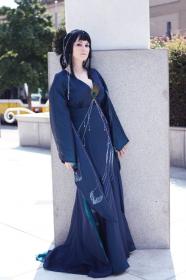
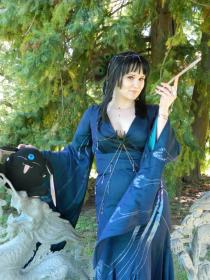
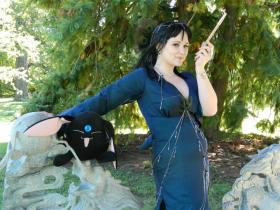
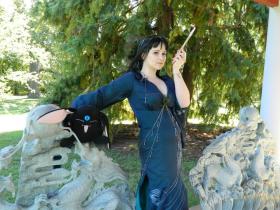
The dress is made of more fabric than it looks like. It's top layer is a midnight blue chiffon, the next layer is a peacock green lining, then under that is a black lining, then under that is the green again so that it would show in the split. Why so many layers? Because it was too light and flimsy at first and I felt naked with it on. It's a mixture of pattern drafting and pattern Frankenstiening. I chose to make the bottom of the skirt mermaid out because...well...I'm insane maybe. It made it so hard to figure out exactly how high the split should go and where to put the detail. But once I had it together (that was the easy part at maybe 5-10 hours complete for sewing) I started the hard part. I had to hand paint each of those feathers, free-handed. I didn't make a stencil because each feather is different in size and with a different number of points. Combined it was about 15 hours of painting on the feathers because each took about an hour to paint to make it fade properly. There are three on the skirt and three on each side of the sleeves.
The jewelry was another long task. I hand strung all the beads on wire then connected them to the chain for both the dress and the wig. To make sure they were secure, I put a dab of superglue on them. The chains on the dress are removable, attaching to the pin on the back of the feather at the collar. The ones in the wig are wrapped and sewn into place. I added the chain to the loops of the wig to give it some interest since you don't see the back of the hair in the single reference shot.
Onto the wig...lord god in heaven I had trouble figuring that out. After a little questioning, I went with making it various layers of loops and long pieces draping down. The wig was originally 48" long, so there was a lot of hair to work with. I think I spent about 5 hours styling it and trimming the bangs just a bit shorter. It's heavy, but it didn't move once I had it all bobby pinned into place. The comb in the wig is just a regular hair comb with peacock feathers glued onto it and then slid in to hide the comb behind the loops.
I lucked up on the shoes, they were the ones I wore in my brother's wedding and they looked perfect with the dress. The downside? 4" heels at a convention. I survived though. I paired it with some fishnet stockings, added Mokona, a pipe, and my red contacts and it was complete...well, that's if I don't decide to paint one more feather on the front of the dress. - Personal Thoughts:
- This costume started out scaring the bejeezus out of me because I have really shaky hands and knew that the painting was going to wear on my fragile nerves. It turned out all right, but I had one little problem that turned out be nothing that actually put me in tears. Overall, I learned a few things and was happy with the result since I had been wanting to cosplay Yuuko for quite some time.
Wig Details
- Wig Brand
- Cosplay-Wig
- Wig Name
- 47.5'' Long Bang
- Original Color:
- Black
- Styling Time
- Approx. 5-6 hours
- Wig Quality Rating
- 5 / 5.00
- Styling Notes
- This wig started out 4' long and went to my knees. It already had the bangs, I just had to cut the face framing pieces. Then I began sectioning it off and twisting the pieces up. They are held in with bobby pins and hair spray. The jewelry and chains are sewn in in random places to keep it from sliding around. The peacock feathers are attached to a comb that slides right in behind the loops.
Add a Comment












Sorry, you must be a registered user of and logged in to view and add comments. Either log in or register now!