

ACParadise Network:
American Cosplay Paradise
American Cosplay Experience
American Cosplay Snapshots
Cosplayer Ion > Costume of Yeager (Tales of Vesperia)
- Most Recent Photo
- 08-08-2011
- Series
- Tales of Vesperia
- Character
- Yeager
- Year Completed:
- N/A
- Construction Difficulty:
- N/A
- Awards
- Best in Novice: Hall Cosplay at AUSA 2009
- Costume worn at:
- Anime USA 2009
- Katsucon 2011
- Otakon 2010
- Otakon 2009

About this Costume
- Construction Details:
-
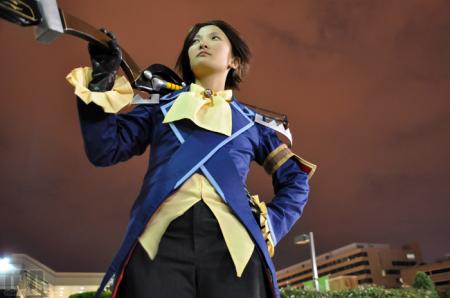
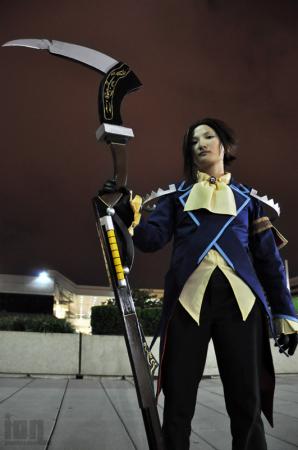
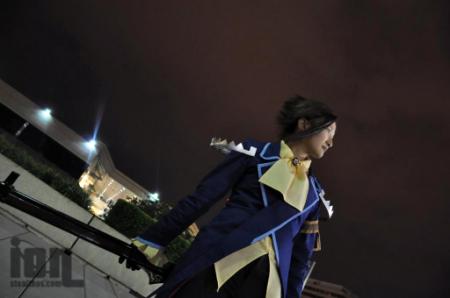
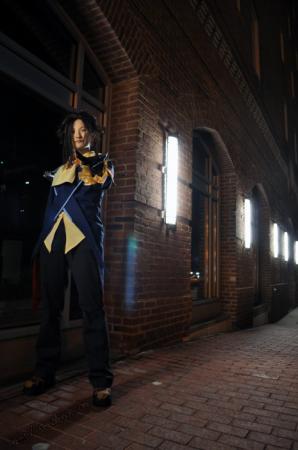
This is definitely my favorite costume to make and wear for 2009. One of the biggest challenges for me with this costume was deciding how to actually get into the jacket. The lapels cross over each other in an unusual way. I didn't want to use a back zip on a jacket though. After drafting several patterns for the jacket, I decided to use a front closure with snaps and velcro on the lapels. I knew I would have to line the jacket because the lining was a contrast color, so I decided to try and keep the fabric on the jacket as lightweight as possible. I opted for twill (pretty standard for blazers and jackets) and lined it using a dull red bridal satin which not only looked and felt delicious, but also added some structure to the jacket. The yellow shirt is made from poplin (also another standard choice for shirting). I decided to put a zipper in the shirt because reference artwork shows that the 2 sides of Yeager's shirt do not overlap, so buttons and snaps were out. For the ruffles on the sleeves I just used box pleats, which given the type of fabric I selected for the shirt, the pleats looked far better than simply gathering and stitching. The scarf was gathered at the top (box pleats here looked rather silly) and stitched to a neck band which attaches at the back of the collar rather like bow ties. I cast the brooch he wears using Cast'n'Craft, which didn't exactly turn out as planned due to dye issues. Regardless, the piece was still usable so I airbrushed over the brooch in the color I really wanted, découpaged the white design onto it, sealed it, and added the gold trim around it. It's attached to the scarf using a badge pin. The pants are pants. Not much I can really add about construction, they are made from charcoal gray cotton/poly/lyrca mix which proved very comfortable and easy to move in. In a moment of silliness, I decided I wanted to pretend to be a Japanese cosplayer and wear platform shoes so I could be taller like the character. So I made the shoe covers to fit over some chunky platform shoes. The black pieces are made from dull black whisper vinyl, since the black parts were closest to the ground, I figured vinyl would be easiest to clean. The 2 shades of brown/tan are cotton with the smaller piece being appliquéd on. All in all they looked wonderful, but my feet disagreed. So I have since modified the shoe covers to fit over reasonable shoes. The arm band/badge was pretty easy. I used some of the yellow poplin for the shirt to make matching bias tape. In photoshop I redrew the design on the badge so it would be print quality. The design is actually an iron-on but it looks surprisingly good! The red fabric is rodeo, and surprise, the two beige/brown colors are the same fabric from my shoe covers. I wanted the arm band to be flexible and move with the costume. His ridiculous bear trap/saw blades on the shoulders were parts I was avoiding although once I started, they were quite easy to finish. I used painted & gessoed craft foam reinforced with wire to keep their shape and they are pinned onto the jacket using badge pins. I wanted them removable so I can wash the costume as needed. I think they came out quite realistic looking. Gesso gave them enough texture and the metallic silver paint was nice. I did "weather" the bear traps with dark green to give the pieces a "worn" metal look. It's subtle but a nice touch. The gun, in and of itself, was special to make. I referenced the character art and a lot of my father's gun manuals, as he is a gunsmith, why not, the resources are there. Unfortunately I was unable to find official images of just Yeager's gun so I ended up basing the designs more on historical firearms. I started drafting patterns (as it is actually 5 separate pieces). I wanted to have the look of just the gun, but the versatility of having the scythe arm swing out. After much plotting and drafting, I was able to design the scythe arm to completely fold into the stock. I used the band saw to cut out the scythe and stock pieces from the craft plywood I plotted on. For the remainder of stock (the pieces not including the scythe or the piece it folds into), I used 1" thick pine and carved out a trough for pvc pipe to simulate a barrel. The yellow detailing is pvc pipe wrapped in craft lace. The silver end pieces on each yellow piece is craft foam. After much sanding, priming, and painting. It seemed pretty dandy for a first try at building a rifle. Detail pieces on the stock are craft foam. I added "Puffy paint" where the gold designs are for a 3D look, sealed with gesso, spraypainted in black, and went over the 3D areas with gold paint pen. The wig was not too bad to style. I bought a short brown wig and layered it a little using thinning shears. Luckily from another project I had some braiding hair left over so I could add the long piece of bangs/chunk of hair he has. After that I just went to town spiking the wig using Göt2B blasting spray. All in all, I am really satisfied with how this came out.
Wig Details
- Wig Brand
- New Look
- Wig Name
- Chic Freak
- Original Color:
- #8
- Styling Time
- 1hr
- Styling Notes
- The style was already messy out of the bag, I just used my steamer to set in some spikes and made a weft for the long chunk of bangs he has. It was a quick modification.
Add a Comment

-
 349136 Visitors
 -
- Cosplayer Info
- Costumes Worn
- Costumes Made
- Props
- Wigs
- Items for Sale
- Favorites
- Convention History


Sorry, you must be a registered user of and logged in to view and add comments. Either log in or register now!