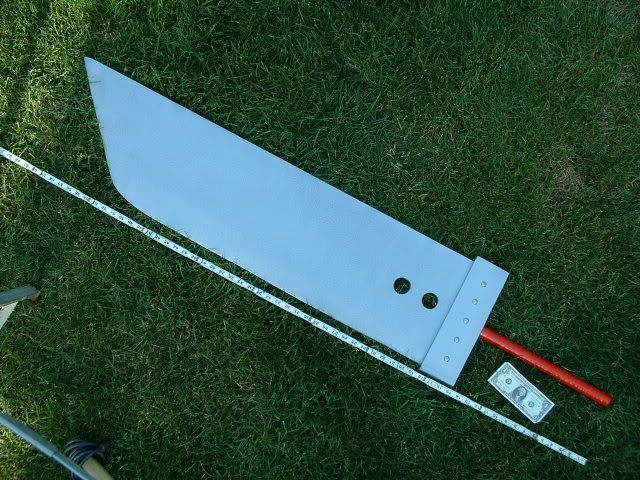
YUFFIE-CROSS SWORD HELP!!!
I either need help in making it (any suggestions are helpful!)
or a website to purchase it from or someone to make one for me, I don't care if it's wood or metal, I just can't find a place to buy it so I figure I have to make it:( HELP ME PLEASE!!!!!!
http://amethyst-angel.com/cosimages/yuf ... nished.jpg
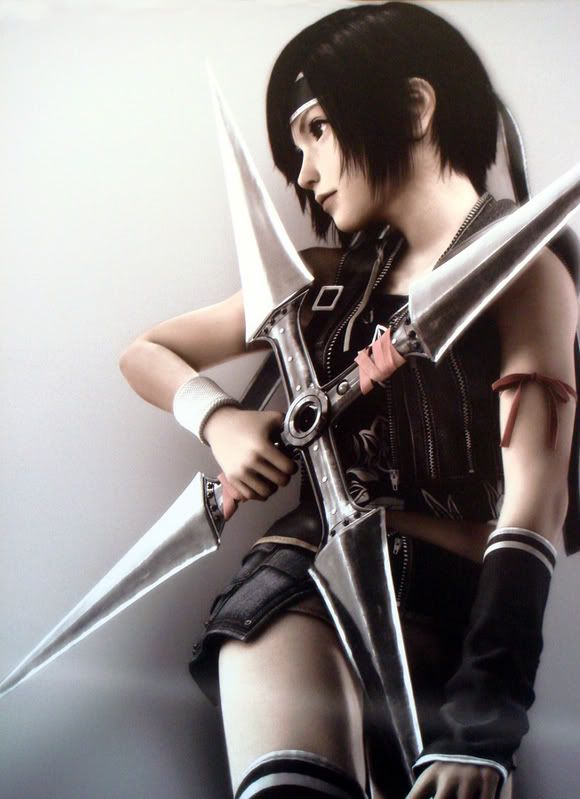
or a website to purchase it from or someone to make one for me, I don't care if it's wood or metal, I just can't find a place to buy it so I figure I have to make it:( HELP ME PLEASE!!!!!!
http://amethyst-angel.com/cosimages/yuf ... nished.jpg
It's Showtime Girls!
this is a great way to make good weapons ^^
A19riku wrote:I would also suggest foamboard. I use it for most of my props. It is kinda weak when you only have one layer but most decent sized swords are at least maybe 3 layers thick. Still even one layer can last if treaten with care. I know the lightning sword I made for rosabella has some areas that are only one layer thick and they only have minimal damage after 3 or 4 cons , not to mention being shipped by ups and the flight to and from anime expo.
Also foamboard is cheap, lightweight, and extremely easy to work with.
I made a tutorial for the lightning sword awhile ago so ill copy it here for you. I know your making a different sword but the process would be the same. But if you need any help or advice feel free to pm me. I would offer more advice specific to your sword but I don't know what it looks like -_-;;
anyway here is the tutorial I hope it helps
So here is my tutorial on how to make lightning's sword from FFXIII
MATERIALS:
* foamboard *primer
*gorilla glue *silver spray paint
*boxcutter * red and black acrylic paint
*large paper * projector (optional but its the easiest way to go)
*wax paper (recommended but optional)
*sandpaper * some sort of clear sealer
before i get started with the explaination here is the link to my gallery im having some problems with getting some more detailed pic up right now but in my gallery i have pics through the whole process and their labled as to what part im at (ie. schematics, layers, finished product ...) so please use those for reference
http://images.cosplay.com/gallery.ph...4&member=70147
i made the sword out of foamboard (you can get it at the dollar store so its cheap) and i did it all on my own in about 4-5 days and most of that time was bc i messed up the first time and i had to wait for the paint to dry so this prorp is not very time consuming or hard.
ok first get a good image of the side of the sword head on and then if you have a projector use it to make a large projection on the wall of your sword (about 50" for lightning) then trace the image onto paper (you can tape sheets together or use newspaper )
*** note the 50" recommended measurement was made for someone about 5' 4" *** therefore if you feel this size would not be right for your height then you will want to measure the length when you are standing from the groung to your chest and use this for the length of your sword
now cutout your image so that ur left with a full size paper version of your sword (these are ur schematics) **** you can also make schematics by gridding off ur image and paper and drawing by hand or by printing out the large version from ur computer but that can be a lot of ink****
ok once you have your schematic figure out how mant layers you want ( i did 7 for lighting 1 base for the whole sword 2 (1 on each side) inner layers of the sword and all the handle 2 of just the inner handle and 2 of the higher parts of the handle ***** there will be seams on the sword part bc it wont all fit on the foam board make the single bases seam under the handle so that it is still reinforced by all the layers of the handle then make the 2 inner sword ones cover the whole base seam so that it reinforces that seam but also is having the handle reinforce its own seam****
use your schematics to trace the layers onto your foamboard going from largest to smallest and the cutout the foam board shapes with a box knife
now glue together the 1 base layer and the 2 inner sword layers (1 on each side of the base layer ) remember these 3 layers will be made up of 6 pieces bc they are so long that they need to have seams
once you get them glued together put heavy objects ie books and other things all over the top of the sword to make sure the pieces stay together( i would suggest having wax paper under it so it wont stick as much) ****** THIS IS PROBABLY ONE OF THE MOST IMPORTANT THINGS I CAN TELL YOU MOST GLUES WILL MELT FOAM soo i use gorilla glue it dries in about 1 hour and has a STRONG hold the only downside is it foams when drying so use very very little near the edges or it will foam out the cracks you can also use liquid nails but personally i prefer gorilla glue and walmart has gorilla glue so ya its easy to find
once the sword bases are glued glue the remaining pieces the same way
now sand you sword's edges until your happy with it
**** i know on the handle with so many layers the edges will look really rough even after you sand so you can paper mache over them so that their smooth ( personally i was on a time limit so i didnt and even then its not that noticable)*****
once you sand you can add the engravings to her sword by taking the end of a pencil and pressing into the foam slightly so that it indents the design you can also paint on the design but i think the indented version lookes a lot nicer
now your sword is completely made you just have to paint it BUT a lot of paints will melt foam too (spray paint!!) so first you have to use primer on the entire sword i did 2-3 coats to be safe and it gives the foamboard extra strength
once it is completely primed make sure you didnt miss any spots bc any spot not primed will melt and then you will have a tiny hole if you did miss a spot hit it w/ primer in the spot or you can just put a little elmers glue over it
once you have primed the sword i would use silver spraypaint do a few coats of that its super shiny and you wont get brush strokes
then paint on the details w/ a couple of coats of acrylic paint.( you will have both a dark red and black designs) ****** watch out though bc the acrylic can chip off at this stage***
once your sword is completely painted cover it with polyurathane, laquer, or some type of clear sealer this will make you sword glossy and prevent the acrylic paint from chipping
now ur done but if for some reason you need to touch up something small i know i use sharpies to touch up all of my props
I hope this tutorial is helpful. If anything is unclear or you just have other qusetions feel free to pm me.
Check out my site...
http://www.freewebs.com/comcos
Gaijin USA FEED THE ADDICTION!
For your anime needs!
http://www.gaijinusa.com
http://www.freewebs.com/comcos
Gaijin USA FEED THE ADDICTION!
For your anime needs!
http://www.gaijinusa.com
sorry you could look for a prop commissioner on the cosplay.com new marketplace ^^
Check out my site...
http://www.freewebs.com/comcos
Gaijin USA FEED THE ADDICTION!
For your anime needs!
http://www.gaijinusa.com
http://www.freewebs.com/comcos
Gaijin USA FEED THE ADDICTION!
For your anime needs!
http://www.gaijinusa.com
...pvc...pipe...that would look too round.....idk maybe you can have someone commission it for you
Check out my site...
http://www.freewebs.com/comcos
Gaijin USA FEED THE ADDICTION!
For your anime needs!
http://www.gaijinusa.com
http://www.freewebs.com/comcos
Gaijin USA FEED THE ADDICTION!
For your anime needs!
http://www.gaijinusa.com
umm if your looking for more of a buying rout I know they do sell them. My friend did yuffi and she bought her shruiken at a con. Though about an hour ago I did write a tutorial for this ahhh but when I submitted it it deleted my post for some reason and I couldn't retrieve it so ill try to sumarize what I said and if your interested then I can write a more detailed version I just don't have that much time right now.
but ya basically what I said is to make 3 cutouts of foamboard in the basic shape and glue them together.
Then cut the shape for the front side of the blade out of craft foam. Cut the piece in half where the 2 panels would come to a point. Bevel both inside edges and super glue them back together now do the same thing but for the back of the blade.
Once you have 2 piece ( one being the front and one being the back) bevel the outside edges and then carefully glue the edges together.
Now you should have a 3D blade with the point at one end and the other end open. Now carefully slip the open over the foamboard piece where one of the blades should be. (note you might have to cut the foamboard blade down some to fit the 3D blade over it but its ok bc no one will see it)
There will be some space left where the 3D blade doesn't fully touch the foamboard base so you can cover that with either papermache, another piece of craft foam cut to fit the space, or I use model magic.
Then repete for the other 3 blades ,add any final details, sand (if needed), prime, and paint.
I based this off the way I made my blades on my thief rikku daggars
so here are some pics to use as refs
Foamboard cut outs
http://i124.photobucket.com/albums/p12/ ... IM1376.jpg
3D blade once fully attached
http://i124.photobucket.com/albums/p12/ ... IM1385.jpg
Almost finished ( just needs weathering on 3 sides)
http://i124.photobucket.com/albums/p12/ ... IM1386.jpg
I hope this helps and if you want some more details in the process I would be happy to help I just don't have time to write a whole nother tutorial tonight.
good luck
oh and if you are looking to buy here is one its not the best but it is just what I found quickly
http://cgi.ebay.com/NEW-FINAL-FANTASY-V ... p1638.m123
otherwise I would just find someone to commission itin the comissions thread thing
~ Reks : FFXII -5%
~ Neku : TWEWY - 15%
~ Len : Vocaloid - 0%
~ Neku : TWEWY - 15%
~ Len : Vocaloid - 0%
i would not suggest getting that it looks really cheap :/
I think you could do better if you tried all they did was get 2 peices of plywood sand and paint it.
Check out my site...
http://www.freewebs.com/comcos
Gaijin USA FEED THE ADDICTION!
For your anime needs!
http://www.gaijinusa.com
http://www.freewebs.com/comcos
Gaijin USA FEED THE ADDICTION!
For your anime needs!
http://www.gaijinusa.com
I have already looked on ebay and I found nothing. well nothing that would look good anyway. I will definately run those instructions by my family and see if they think its doable. my family is the main reason I can do cosplay. But I will definatly see what they think and we will go from there. If I need better instructions I will definately respond back.
It's Showtime Girls!
Yes, Probably in around $200 (Mostly shipping), in the current weather maybe 2 months, and yes.
More at my DA account
http://sterling-scorpion.deviantart.com/
More at my DA account
http://sterling-scorpion.deviantart.com/
Ok If you can make it look like almost the real thing then I will do it. But I have a condition. Its nothing against you or anything I will pay you half now and then you send me pics of the progress that you make. And when you send me the last pic of what it looks like I will send you the other half. Does that sound good to you? And also what kind of payment do you prefer?
It's Showtime Girls!
-
- Posts: 40
- Joined: Tue Mar 11, 2008 4:55 pm
- Location: Wessington Springs, South Dakota
- Contact:
Re: YUFFIE-CROSS SWORD HELP!!!
this actually a futuristic weapon. maybe its better you choose the meta one
_________________
Stereolithography
_________________
Stereolithography